SmartDNS
Using the VPN will automatically disable your local SmartDNS settings. Please choose either the one or the other.
Register your IP address and choose your prefered Netflix region
Login to your client area (https://wannaflix.com/clientarea.php)
Click on your active SmartDNS subscription
Select your prefered Netflix region and click "Update"
You will have to re-submit your IP address each time it changes (router reboots, new location, etc.)
Setting up the DNS on Android
Important
There are a lot of implementations of Android in the market. That is why each device might have a different way of changing DNS settings. Below are guides for standard setup on Android 9.x, 8.x, 5.x, 4.x, and 2.x
Changing DNS on Android 9.x
1. Find Settings.
2. Select "Network and Internet"
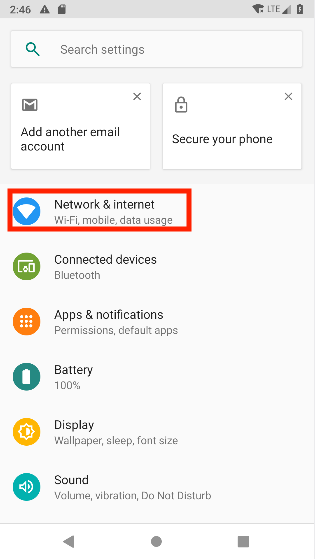
3. Click on Wifi.
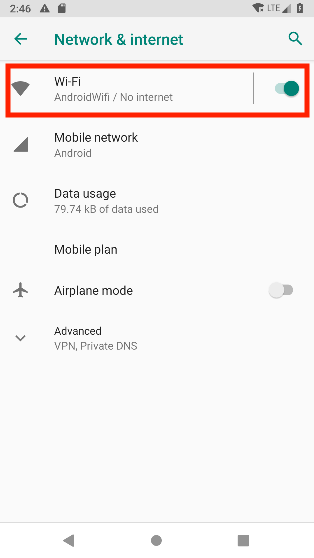
4. Select your Wifi network.
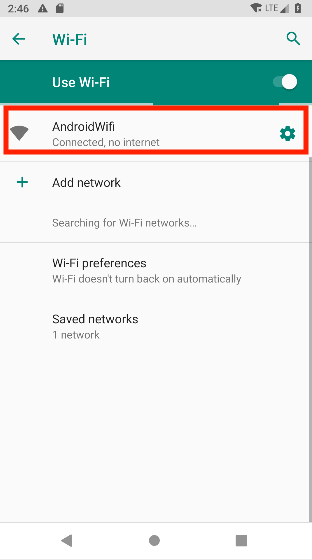
5. Click on "Advanced".
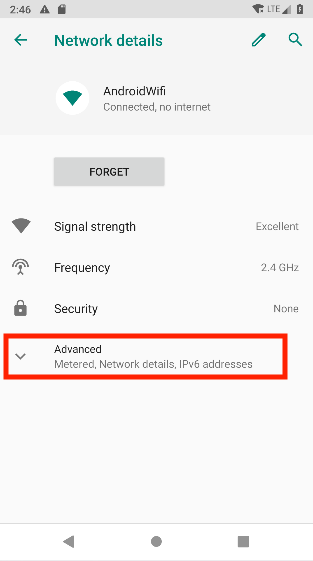
6. For "IP Settings", choose "Static"
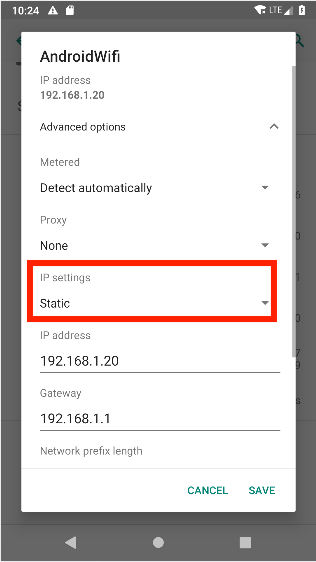
7. Click on the edit icon in the top-right corner.
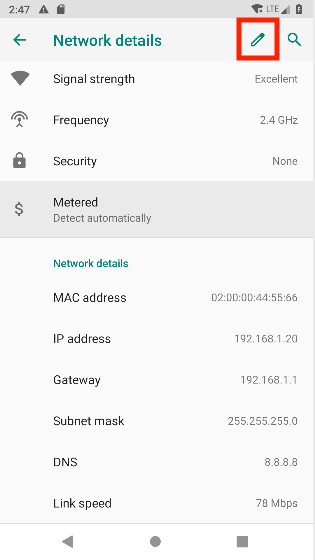
8. Input the Unlocator DNS servers, DNS 1: 165.227.243.239
& DNS 2: 165.227.254.128
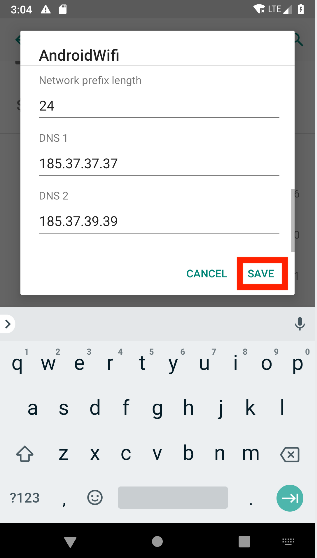
9. Tap Save.
10. Restart your device.
Changing DNS on Android 8.x
1. Find Settings.
2. Select Network & Internet.
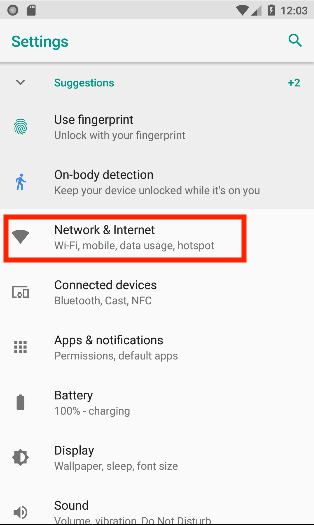
3. Select "WiFi".
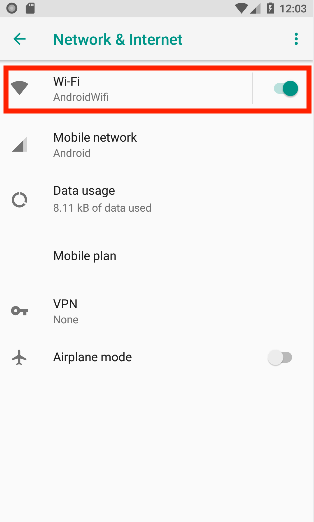
4. Tap and hold the network you want to connect to until a box appears.
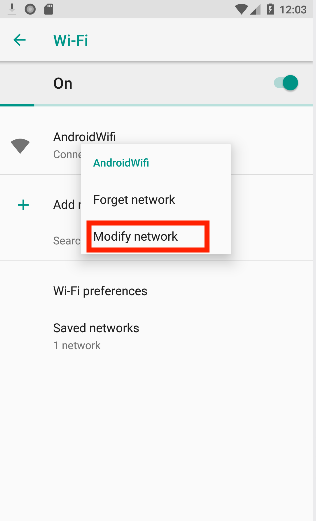
5. Select Modify Network.
6. Tap Advanced Options.
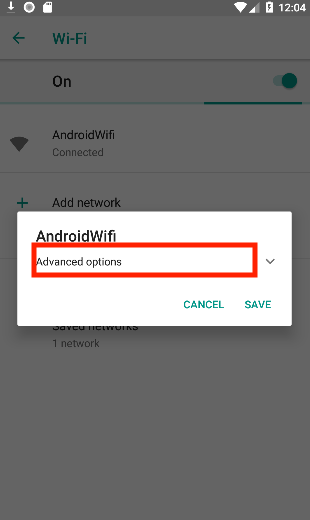
7. For "IP Settings" choose "Static".
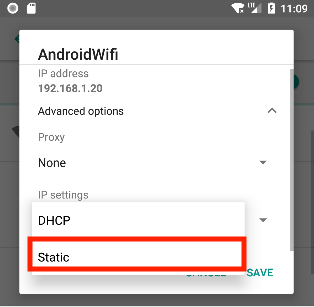
8. Manually enter your IP address, Gateway, Subnet/Network Prefix Length, using the same values you see in gray. Otherwise, you will not be able to save your settings.
9. Input the Unlocator DNS servers, DNS 1: 165.227.243.239 & DNS 2: 165.227.254.128
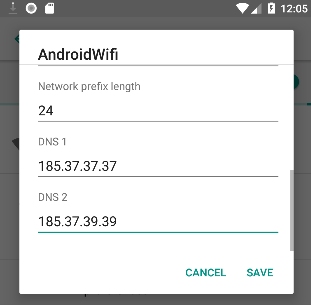
10. Tap Save.
11. Restart your device.
Changing DNS on Android 5.x
1. Find Settings.
2. Select Wi-Fi settings.
3. Tap and hold the network you want to connect to until a box appears.
4. Select Modify Network.
5. Tap the checkbox next to Show Advanced Options.
6. Manually enter your IP address, Gateway, Subnet/Network Prefix Length, using the same values you see in gray. Otherwise, you will not be able to save your settings.
7. Input the Unlocator DNS servers: 165.227.243.239 & Secondary Server 165.227.254.128
8. Tap Save.
9. Restart your device
Changing DNS on Android 4.x
1. Find Settings
2. Choose Wi-Fi by actually pressing Wi-F
3. Press and hold your network and a window will open up
4. Choose Modify Network
5. Check the Show advanced options checkbox at the bottom of the screen
6. Set IP settings to Static
7. Simply keep your IP address, Gateway and Network prefix length the same
8. Input the Unlocator DNS servers: 165.227.243.239 & Secondary Server 165.227.254.128
9. Press Save
10. Restart your device
Changing DNS on Android 2.x
1. Find Settings
2. Select Wireless and Networks
3. Then choose Wi-Fi Settings
4. In the Menu go to Advanced
5. Select Use static IP
6. Copy or write down your current IP address, which you can see directly above the IP address field
7. Set your Gateway to the IP of your router. Normally the router address is the same of your current IP but with a 1 at the end. As an example if your IP is 10.0.1.3 then your router is 10.0.1.1
8. Set the Netmask to 255.255.255.0
9. Input the Unlocator DNS servers: 165.227.243.239 & Secondary Server 165.227.254.128
10. Go to Menu > Save
11. Restart your device
Last updated